Don’t you just adore all of the amazing Dollar Store crafts around the blogs and on Pinterest? I was so inspired that I KNEW we definitely needed to try a couple of our own! Today and tomorrow, we’ll do two fast holiday projects using items from the Dollar Store. We are not quite in Christmas crunch time yet, my dear friends, though we’re getting close! Need a fast, quick and inexpensive gift? You can quickly transform a glass candleholder from the Dollar Store with Sharpie paint pens, elevate a simple, battery operated candle with some trim and a ready-made embellishment from the craft store and you have a great gift!
Here’s what you need for this project:
- Square flat glass candleholder from the Dollar Store
- Battery operated candle (I did NOT get this from the Dollar Store – I already had one on hand. I like these because they can go anywhere. Use a real candle if you want!)
- Sharpie Paint Pens in your choice of colors (I used metallic silver and gold)
- Printed words cut to size on paper from your computer/printer and painter’s or masking tape
- Trim or ribbon in the style and color of your choice (I used gold metallic braided trim 1/2″ wide)
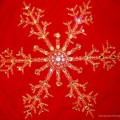
- Embellishment (I used a beaded and pearl snowflake by Jolee’s By You)
- Hot glue gun and glue sticks
Decide what words you would like to put on your glass candleholder. I used the words “Silver and Gold.” In Microsoft Word, draw a text box approximately 6” x 2” – the size of the box will depend on your text, font, and font size, but should not exceed 6” to fit along the side of the glass.
Clean the front of the glass candleholder to be painted with alcohol and let dry. Cut out your text box and tape to the underside of the glass as in the photo below.
Trace the words on the glass with your paint pens. I added dots around the words; you add whatever extra flourish you’d like! Repeat on the opposite side of the glass.
Wrap your ribbon or trim around the candle, adhering with hot glue. I did three rows of trim. Adhere your embellishment to the front of the trim with hot glue.
You’re done! You have a quick, fast and pretty gift for someone on your list. Ok…if you want to keep it for yourself, I totally understand! This project goes very quickly, so you could probably whip up several – have one for yourself AND a couple to give as gifts!
Tomorrow we’ll have another quick Dollar Store holiday project!
I did not want to forget to share that our Flashback Friday Christmas Pin(e) Tree Wall Art was featured on Totally Tutorials on December 11! This blog features tons of fabulous project tutorials and I encourage you to put it on your must-visit list!