

Paper Twist Rose
Happy Emme’s Flashback Friday, our first of 2013!
How many of you are familiar with Paper “Creative” Twist? No, it’s not a dance! A craft product known back in “the day” as Creative Twist and the darling of the crafting world in the 80’s, (and probably even earlier) Paper Twist is paper with a crinkled texture that comes tightly twisted in a cord.
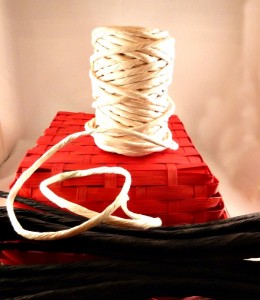
Paper twist rolls
The paper “untwists” to a wide, heavy creped ribbon. We want to work with the paper that opens to a 4 ½” width, though it also was available in a wider. Paper twist is strong, has great body, is easy to form and mold, very forgiving, and best of all, really maintains its shape! Paper twist is usually sold either by the hank or roll.
During its heyday, Paper Twist was called “Creative Twist” and Emme was, hands down, the Creative Twist Queen! We spent many fun and happy hours making lots of beautiful projects with Creative Twist at Emme’s house. As Heidi Klum is famous for saying on Project Runway, (one of my fave shows!) “One day you’re in-and the next day, you’re out!” This goes for fashion AND craft supplies. Paper “Creative” Twist kind of just…fell out of fashion.
I say, let’s rediscover this versatile, low-cost product! I have tons of project ideas from Emme’s archives for us and a little “twist” on a few. Yes….I know that was a truly bad pun, but I couldn’t resist! One of the very best things about making projects with Paper Twist? Anyone –YOU – can make them! Paper Twist projects don’t take mad skills or lots of complicated tools. And you know what? I find untwisting the paper to be a great stress reliever!
It used to be that you could walk into any store with a craft aisle and there were bins and bins of Paper Twist in every color of the rainbow. Now….not so much! I haven’t seen it at retail anywhere. If you have the scoop any store(s) that still carry Paper Twist, pretty please leave us a comment or drop me a note!
Where to Find Paper Twist
Big relief, though, Paper Twist is STILL available online. Prices, lengths and available colors vary. I tried to pull as much info together as possible, but please forgive any mistakes! Here’s what I found about where we can buy Paper Twist, and clicking on each name below will take you directly to their site:
- Joann – Right now, online only, Joann has limited colors on sale, $.83 for a 6-yard hank. Not too shabby!
- Sand Art Supply – Many colors available at $.20 per yard!
- American Twisting Company – Many colors and styles are available, including candy stripes! American Twisting Company has a minimum order of $25.00 – Paper Twist hanks are available for $1.49 for a 6-yard hank or $5.99 for a 25-yard hank.
- Paper Mart – Paper Mart has lots of colors – including metallics – available. Paper Twist is sold for $2.69 for a 25-yard hank for natural and colors, $3.54 per 25-yard hank for metallic and iridescent; additionally, they sell 200 yard rolls in natural and white for $10.16 and colors for $13.93. Wow!
Now that you know all about Paper Twist and where we can get it, whatever are we going to DO with it? We’re going to start our year of Paper Twist rediscovery with Valentine’s Day. Roses are synonymous with Valentine’s Day…how about a beautiful Paper Twist rose? Bet it will last longer than a real one and we KNOW it will cost a lot less for Valentine’s Day! Once you get the feel of the paper and wrapping the wire, these roses are super easy. Let’s start with one for today
Paper Twist Rose
Here’s what we need for one large rose
- Paper Twist in red, white, pink or the color of your choice
- Petal template (Click on the photo template below, save and print. Size of petal is a bit under 3” in height)
- 18” of 18-gauge florist wire for rose stem (Can be trimmed depending on use!)
- 30-gauge spool wire (26 or 28 will work fine, too – I used 26 because I had it on hand.)
- Green crepe florist tape

Petal template
Here what we do:
Cut 15 lengths of Paper Twist, approximately 3 ½” in length each, and untwist each length.
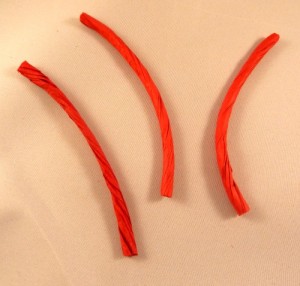
Creative twist cut into pieces for petals
Place the petal template on the grain of the paper and trace pattern on each length of Paper Twist; cut each for a total of 15 petals.

Traced and cut paper twist petal
For the rose stem, bend 1 end of the 18-gauge wire about one inch into a loop, as in the photo below.
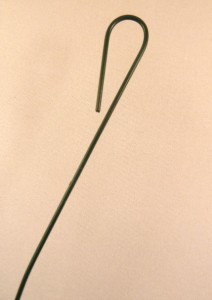
Looped 30-gauge floral wire
To create the rose center, place the looped end of the stem on 1 petal. Fold top of petal over stem about 1” and fold corners of petal toward center. (Oh, I need a manicure!)
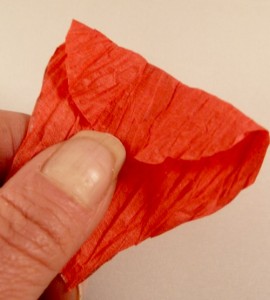
Folding petal over wire loop
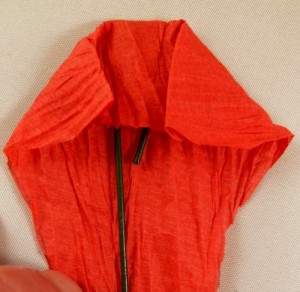
Folding petal sides toward center
From the right edge, wrap petal loosely around the stem and pinch the bottom of the petal for form the base; tightly wrap 30-gauge wire around base to secure rose center to stem, as in photo below.Repeat with second and third petals, loosely wrapping around rose center, and securing with wire.
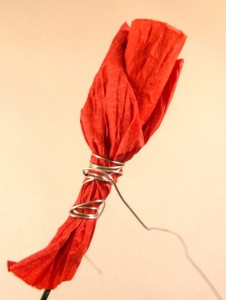
First two petals forming rose center
With remaining petals – Roll top of petal around a pencil and hold for several seconds; remove pencil.
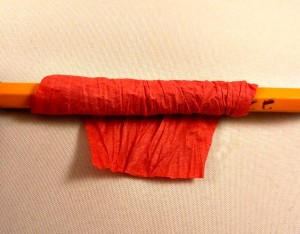
Paper twist petal rolled around pencil
Working with one petal at a time, pinch bottom of petal together. With roll facing out, place pinched end of petal around stem slightly below previous petals and secure with wire. Continue adding petals, staggering around center and don’t be afraid to pull the wire tightly or shape as you go along.
Wrap base and stem of rose with florist tape.
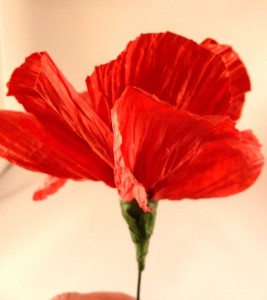
Completed rose wrapped with floral tape
Here’s our finished rose!

Completed Paper Twist Rose
What do you think? These are fun and easy to make! Next time, we can add some leaves with green paper. I have a few projects to share at our next Flashback Friday in two weeks using our roses. Here is one red and one white Paper Twist rose n a little vase and as a box topper. We’ll have more Paper “Creative” Twist projects on Flashback Fridays this year!

White and Red Paper Twist Flowers in Vase
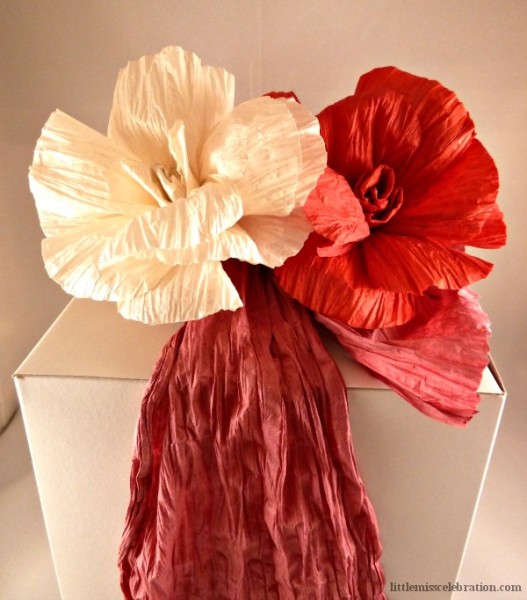
White and Red Paper Twist Roses on a Box with Pink Paper Twist Ribbon
I really hope you enjoyed rediscovering – or discovering – Paper Twist and our pretty roses! Thank you for being here today – it means the world to me!
Flashback Fridays will resume in two weeks because next week is entirely devoted to one special thing! See you tomorrow with a fast, delicious recipe perfect for Football Playoff Weekend!
Linking up this project at:






The paper rose is SO beautiful! I love simple decorations like this!
Elizabth, I’m so glad you like it and they are super easy to make! I am so happy that you stopped by today and thank you!
Cindy, you totally solved a mystery for me! I’ve had a few bundles of paper twist sitting in a drawer for two years. They came in a big box of craft supplies that an aunt gave me after she cleaned out her craft room. I had no idea what they were, let alone what to do with them! Your roses are gorgeous and I’m curious to see what else you’ll be doing with paper twist.
Ann, your message gave me a much needed smile! These Flashback Fridays aren’t such a bad idea if they help solve “mystery” craft supplies! Working with paper twist is so much fun and I’m glad you liked the roses. I’ll have some other fun things you can do with those bundles of paper twist, too, I promise! I always appreciate that you take the time to stop by and your comments….thank you!!!
Looking forward to it! Maybe I can make a kid craft version of one of your paper twist projects. ?
And stopping by and commenting is fun for me. Your blog is so cute and well laid out and you always have fabulous ideas. Plus, you are obviously a very sweet woman and I appreciate the support that you give my blog!
Ann, thanks for making my day!
I was just thinking about Paper Twist the other day, and wondered what became of it. Like macrame, it’s about due for a comeback, don’t you think? Paper Twist roses are perfect for the current wreath craze. Thanks, Cindy.
Sharon, I totally think it’s ready for a comeback and am ready to lead the charge! I have lots of project ideas and it’s kind of fun to share this with others who have never heard of it! Thank you so much for stopping over…I really appreciate it!