
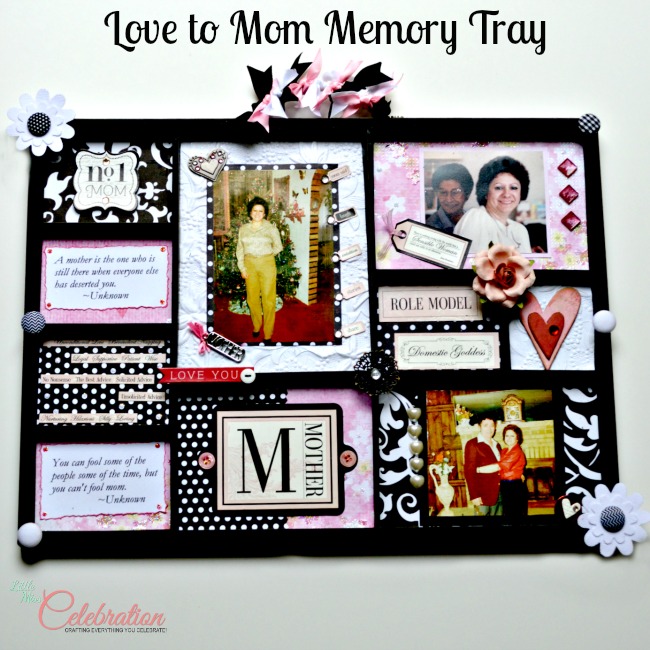
 Can you believe I thought Mother’s Day was NEXT Sunday? Well, for once, I’m ahead of the curve! Here’s a great gift idea for Mom that you can personalize and make any way you’d like. With ready-made embellishments, you can put this together really fast. Mod Podge your paper one night, finish the next day and you have a custom made, unique gift that Mom will cherish.
I have a tradition that I always make something for my Mom that’s all about her. This year, I decided to “display” my love and appreciation for her. I’ll share a few tips that I hope will help you make one, too!
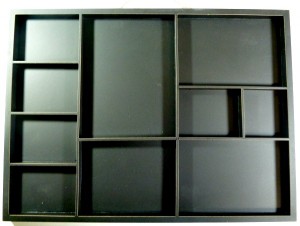
This Memory Tray is from the Recollections brand at Michaels and measures 12.6 inches by 15.7 inches, with 10 openings. I decided on a black, white and pink primary color scheme.
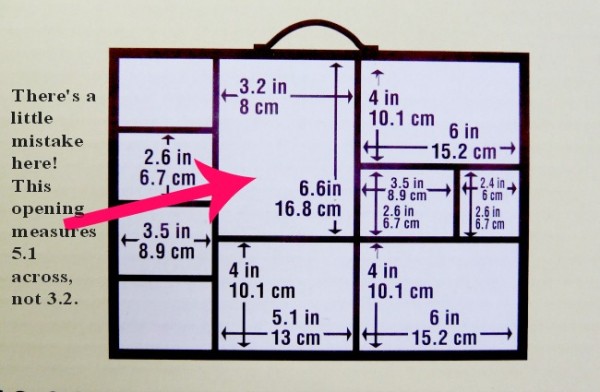
The back of the package provides a size layout for each of the tray openings. However, I found a mistake!!! One of the sizes marked on the box is incorrect. Always measure before you cut your paper – don’t be surprised if sizes noted on any item are not 100% accurate. I’ve found even 12” x 12” paper is not always truly square.
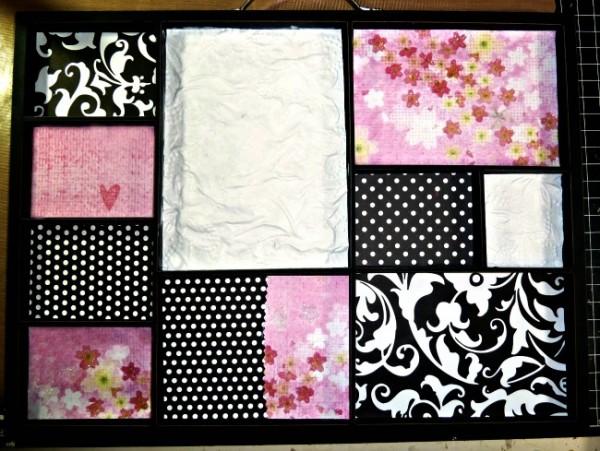
Once all of your paper is cut to size, use Mod Podge to adhere inside each tray opening. I use so much Mod Podge, I really should buy stock! Let the tray dry overnight.
Decide what you want in each tray opening – photos, quotes, embellishments, etc. I highly recommend that you don’t adhere anything permanently until you are absolutely certain and happy with the placement! Trust me on this one, my friends, as I’ve learned this lesson the hard way!
In addition to my beloved Mod Podge, here are some tips, products I can’t live without and a little inspiration!
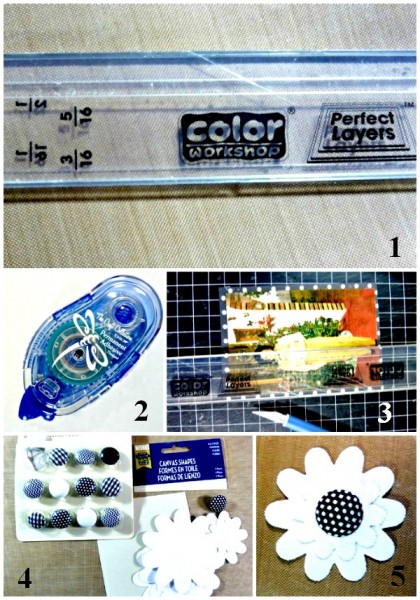
1. and 3. Even if you don’t scrapbook all the time, Perfect Layers is a fantastic tool to have! I bought mine years ago on QVC when they still sold scrapbooking products. You get two “rulers” that allow you to perfectly mat any photo with many different sized borders and even make multiple borders. I have been using Perfect Layers for nearly 10 years and LOVE it! You can learn more about Perfect Layers here.
2. Tombow Permanent Adhesive Tape Runners are my go-to for attaching matted photos and paper!
4. and 5. Make a pretty flower embellishment! Using canvas flower cut-outs and buttons (purchased at Michael’s) layer two different sized flowers and glue. Cut the shanks off the buttons and glue for the flower center.
For the final touch, I tied ribbons around the top “handle” in black, pink and white. This tray has two sawtooth hangers on the back, so it can hang on the wall or be put in a stand on a table. Here’s a little look at some of the sections.
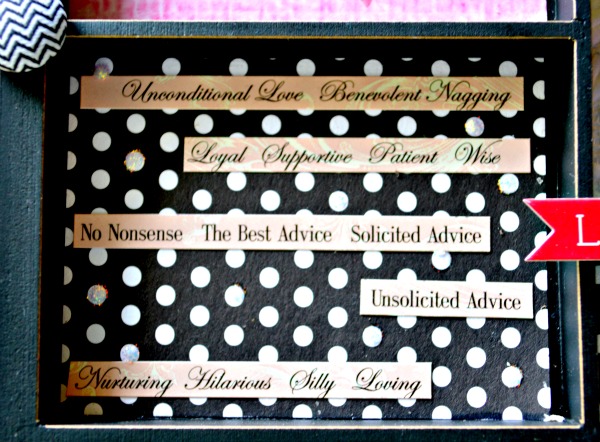
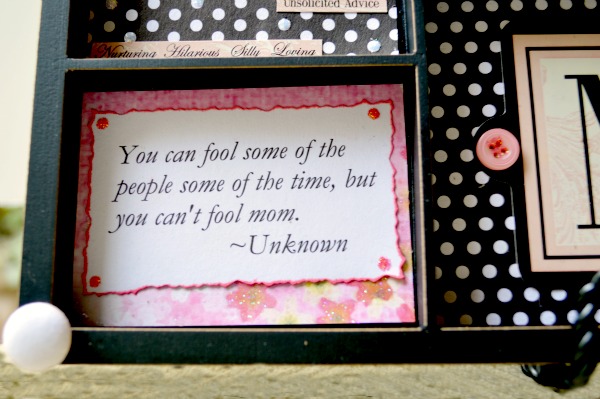
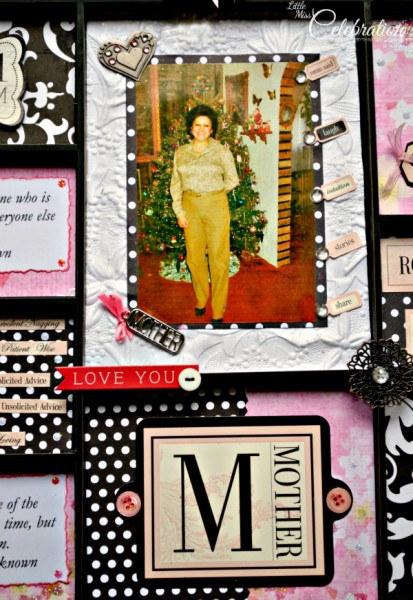
Even if you have never made a scrapbook in your life, you can DO this, I promise! A Memory Tray can be transformed for Mother’s Day or a special gift for any occasion.
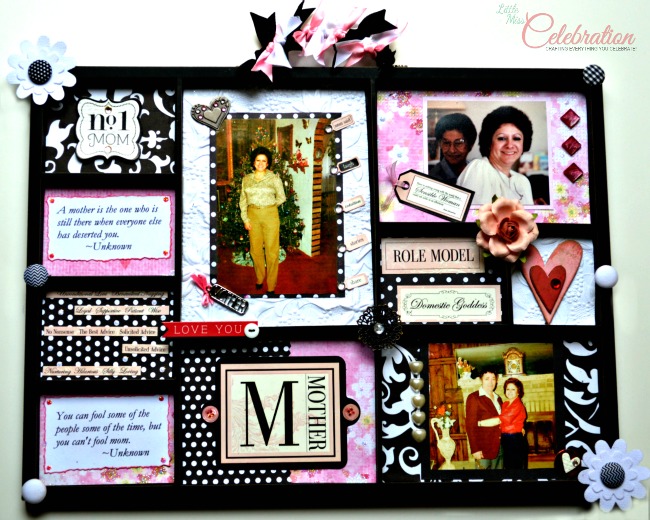
I hope MY Mom loves this gift as much as some of the many others I have made for her! Maybe I’ve inspired you to make one for your Mom this year?
Thank you for visiting and celebrating Mom. Have a happy Monday.
Linking up this project to these fun parties!


Ok, sooo impressed with your craftiness! Great post cindy. ?
Krista, you are so supportive, I’m so lucky you picked me for the Liebster because truly the best part was getting to know you! That was the prize, right? Well, it was in my book! Thanks so much always stopping by!
Hey, you deserve it! You have been working so hard lately and it looks great. ? I really think that is the prize, not getting to know of course.. haha.. but getting to know each other. ? Hope you have a great day!
I love all the textures in this tray! I LOVE working with paper and all the layering. You did such a beautiful job on crafting everything so strategically, Cindy. She’s going to love this forever!
Thanks, Gloria! Paper is so much fun, isn’t it? The hardest part is picking out which ones to actually use! I’m so happy that you like it and think she will too! Fingers crossed! Always so happy that you take the time to visit me!
Well now she’s gonna read your blog and know what she’s getting! ? This is really pretty! She will love it!
Have a great week!
Sandy
Hi Sandy – well, my Mom has not even mastered a cell phone and doesn’t have internet, which kind of makes me sad because she hasn’t seen the blog. I’m safe on the gift!! ? Thank you so much for stopping by and for your nice comment, which I always appreciate. I hope your week is great as well!
Oh, Cindy ~ this is an absolutely perfect gift ~ your Mom will love it {she’s so pretty ~ just like you}
Thanks for sharing at Project Inspire{d} ~ pinning!
Hugs,
Mary Beth
Mary Beth, thank you so much! I’ll give my Mom your sweet compliment, though she will say I look like HER, she was here first. ? (Her standard line!) Thanks for the party, as always, and for the pin! Happy Tuesday! Hugs!
WOW, that looks fabulous. I llove homemade gifts that come from the heart.
Stopping by from the love bakes good cakes blog hop. have a great day.
Karen, that is so nice to say! Thank you so much for visiting and for your sweet comment. I love homemade gifts too, and thank goodness my family does as well! ? Have a wonderful week!
You’re lucky to be ahead of the curve! I am dreadfully behind it. I have yet to think of what to give my mother. Your project turned out beautiful!
Thank you so much, Rosey! Maybe you can make one of these for your Mom! Thanks for visiting!
That’s an awesome gift for mom Cindy, and guess what? I thought it was this Sunday too! Have a wonderful day!!
Hi Doreen – you made me smile and I can’t believe you thought it was this Sunday, too!! Thank you so much for your visit and sweet comment, I appreciate it so much! Have a great week and we’ll keep each other straight on holiday dates! ?
I pinned this and bookmarked it. I so admire what you did for your mom. My Mom has passed away, but I could use this idea for a gift.
Sue, that’s so sweet of you to say, thank you! You are right, this would be a great gift for anyone! Thank you so much for visiting and have a wonderful week!
What a wonderful and thoughtful gift Cindy! You are so crafty and talented:)
Krista
Krista, that is so sweet of you to say! Thank you so much for your visit and wonderful comment – I truly appreciate it! Hope your weekend is wonderful.
So sweet – it turned out GREAT!! I am sure your Mom will love it (even if she already saw it on your blog! Haha)
Pinning of course! xo, Claire
Thanks, Claire! My Mom is totally not technical and not online, which is the only reason I could share this! ? Thanks for your sweet comment and for the pin! ?
This is the sweetest, most thoughtful gift! I wish I would have seen this in time to make one. I’m so going to pin and keep in mind for next year. I love scrapbooking so I already have most everything needed except the shadow box. THANKS!!! ?
Thanks, Sherry! My Mom loves any handmade gift, so I always make one or two things every year. So glad you like it! You have to check out the Bee Beautiful Gift jar I shared today, that’s my other surprise for her, though I kinda want to keep it!